
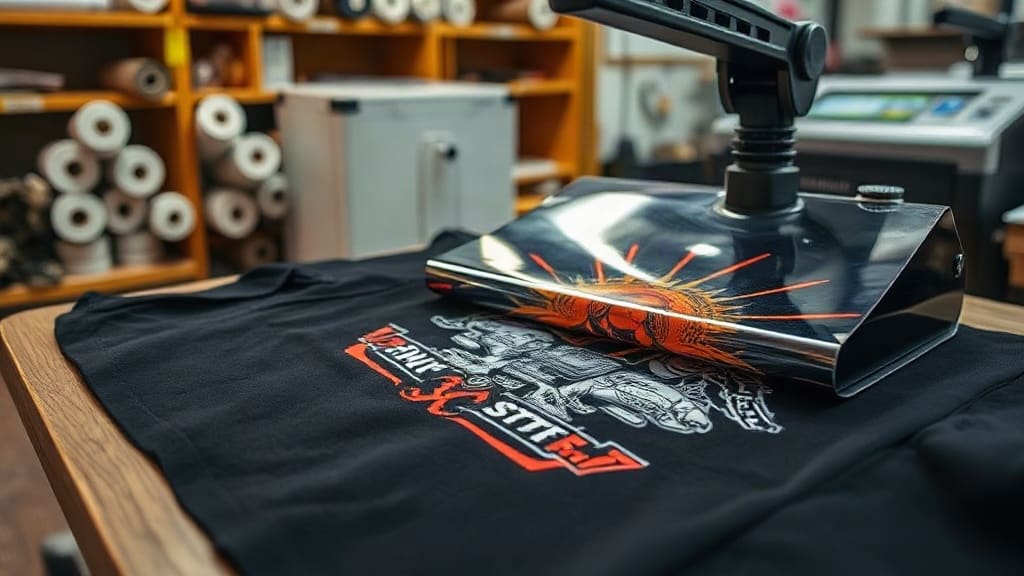
When you first see a DTF transfers print in person, the colors almost look unreal: bright whites, deep blacks, and gradients that seem to glow against the fabric. It's no wonder this technology has quickly become a favorite for small print shops, hobbyists, and anyone who wants to create custom apparel without the setup costs of screen printing or the limitations of vinyl. But behind those eye-catching results is a process with plenty of variables. Get them right, and you'll produce shirts that survive dozens of washes. Get them wrong, and you'll be peeling cracked designs off your clothes. This guide walks you through the entire workflow, from choosing materials to fixing common problems, so you can get consistent, professional results with DTF transfers.
What Are DTF Transfers, Exactly?
DTF stands for Direct to Film. In this method, a specialized printer lays down a mirror-image design onto a PET film using water-based pigment inks. While the ink is still wet, a powder adhesive (often called hot melt powder) is sprinkled over the print. After shaking off the excess, the film goes through a curing oven or heat press to melt the powder into a flexible, sticky layer. The result is a transfer that can be stored for weeks and applied to fabric with a heat press.
What sets DTF apart from other decoration methods is its versatility. Unlike DTG, which requires pretreated 100% cotton fabrics, DTF adheres well to cotton, polyester, blends, and even some nylons and leathers. Unlike vinyl, it can reproduce full-color photographs and fine details without weeding. And unlike screen printing, you don't need a separate screen for each color, making short runs and one-offs economically viable.
Why DTF Is Gaining Popularity
Several factors have pushed DTF into the spotlight. The equipment costs are lower than a DTG printer, the learning curve is manageable, and the prints feel soft compared to older transfer technologies. Plus, the ability to print on demand means you can offer custom products without holding inventory. If you've been thinking about adding apparel decoration to your business, DTF is one of the most accessible entry points.
Choosing the Right Supplies for DTF Transfers
The quality of your finished product starts with your materials. Not all films, powders, and inks are created equal, and cutting corners here often leads to frustration later.
PET Film
Look for double-sided matte PET film. The matte side holds the ink and powder, while the glossy side prevents sticking in the printer. Film thickness matters too; thinner films (around 75 microns) conform better to fabric textures and feel softer, but they can be trickier to handle. Thicker films (100 microns) are more forgiving for beginners.
DTF Inks
You need both CMYK and white ink. The white ink acts as a base layer, allowing colors to pop on dark garments. Quality inks have high pigment load and resist settling. Always agitate white ink daily and keep your printer in a clean, dust-free environment to avoid clogged nozzles.
Adhesive Powder
There are two main types: TPU (thermoplastic polyurethane) and PA (polyamide). TPU powder is softer, more elastic, and better for stretchy fabrics. PA powder is more durable and has a slightly higher melting point. For most apparel, TPU is the safer bet because it feels less plasticky.
Heat Press
A heat press with accurate temperature control and even pressure is non-negotiable. You don't need the most expensive model, but avoid cheap irons or swing-away presses with hot spots. A clamshell or swing-away press with a digital controller will do the job. Also, consider a separate heat press for curing powder if you plan to scale up, but you can use the same press with a curing sheet.
Step-by-Step DTF Printing Process
Here's a reliable workflow that works for most desktop DTF printers. Adjust based on your specific equipment and environment.
- Prepare your artwork. Use a RIP software to mirror the image and set the white ink layer. The white layer should be slightly choked (inset) under the color to prevent a white halo. For dark garments, ensure the white layer is solid.
- Print on film. Load the PET film with the matte side facing the printhead. Run a nozzle check before printing to avoid banding. Print at high quality for detailed designs.
- Apply powder. While the ink is wet, sprinkle TPU powder generously over the print. Tilt the film and tap off excess. You want an even coating that sticks only to the ink, not the bare film.
- Cure the powder. Place the film in a curing oven at 320°F (160°C) for 2-3 minutes, or use a heat press with a protective sheet at 320°F for 30-40 seconds with low pressure. The powder should turn from white to a clear, glossy gel. If it remains white, it's undercured.
- Cool and store. Let the film cool completely. You can stack transfers with a sheet of parchment paper between them and store in a cool, dry place for up to several weeks.
How to Apply DTF Transfers to Fabric
Applying the transfer correctly is just as important as making it. Here's the standard method:
- Preheat the garment. This removes moisture and wrinkles. Press for 5-10 seconds at 320°F (160°C).
- Position the transfer. Place the film with the design face down on the fabric. The glossy side should be up.
- Press. Use medium pressure (around 4-6 on a 1-10 scale) at 320°F for 15-20 seconds. For thicker fabrics or larger designs, you may need 25-30 seconds.
- Peel. Wait 10-15 seconds for the film to cool slightly, then peel it off in a smooth, steady motion. If the design lifts, press again for a few more seconds.
- Post-press (optional). For extra durability, cover with a Teflon sheet and press again for 5-10 seconds. This helps the adhesive fully bond.
Note: Always test with your specific materials. Temperature and time can vary between presses and films.
Troubleshooting Common DTF Issues
Even with experience, problems happen. Here are fixes for the most frequent complaints.
Design Peels Off After Washing
This usually means insufficient pressure, temperature, or time during application. Increase pressure and check that your heat press is actually reaching the set temperature (use an infrared thermometer). Also, ensure the powder was fully cured; undercured adhesive won't bond properly. If the fabric was pre-treated with fabric softener, that can also interfere. Wash garments inside out in cold water and avoid fabric softener.
Cracking or Fading
Cracking often comes from overstretching the garment or using too much powder (which makes the print stiff). Use a softer TPU powder and apply a thin, even layer. Fading can be caused by improper curing or low-quality ink. Make sure the powder is fully melted and the ink is compatible with your printer.
White Ink Not Printing
White ink is notorious for clogging. Agitate the white ink cartridge daily, run a cleaning cycle before each session, and keep the printer in a humid environment (40-60% relative humidity). If clogs persist, try a printhead cleaning solution or consult your printer's manual.
Powder Sticking to Film
If powder sticks to areas without ink, you're either using too much powder or the film has a static charge. Shake off excess more vigorously and consider using an anti-static brush or dryer sheet on the film before printing.
Best Practices for Long-Lasting DTF Prints
To ensure your customers are happy, follow these guidelines:
- Wash inside out in cold water, gentle cycle.
- Do not bleach or use fabric softener.
- Tumble dry low or hang dry.
- Iron on low heat, never directly on the print.
- Wait 24 hours before first wash to allow full adhesion.
Also, consider the fabric type. DTF works on many materials, but on highly textured fabrics like rib knit or canvas, the print may sit on top and feel rougher. For stretchy fabrics, use a TPU powder with high elasticity and stretch the garment slightly when applying to avoid cracking.
Frequently Asked Questions About DTF Transfers
Can I use DTF transfers on dark and light fabrics?
Yes, DTF is suitable for both. On dark fabrics, the white ink base layer ensures colors remain vibrant. On light fabrics, you can often reduce the white layer to make the print thinner and softer.
How long do DTF transfers last?
With proper application and care, DTF prints can last 50 washes or more. The key is correct curing and using quality materials.
Do I need special software for DTF printing?
You need RIP software that can handle white ink layering and mirroring. Many printer manufacturers provide their own RIP, but third-party options like AcroRIP or Cadlink are also popular.
Can I apply DTF transfers with a home iron?
It's possible but not recommended. Irons don't provide even pressure or consistent temperature, leading to poor adhesion. A heat press is essential for professional results.
What's the difference between DTF and DTG?
DTG prints directly onto the fabric, while DTF prints onto a film that is then transferred. DTF works on more fabric types and doesn't require pretreatment, but DTG can produce a softer feel on 100% cotton.
Mastering DTF transfers takes practice, but the payoff is huge: vibrant, durable prints on almost any fabric, with low startup costs and endless creative possibilities. Start with quality supplies, dial in your heat press settings, and don't be afraid to experiment. Before long, you'll be producing custom apparel that looks and feels professional.