
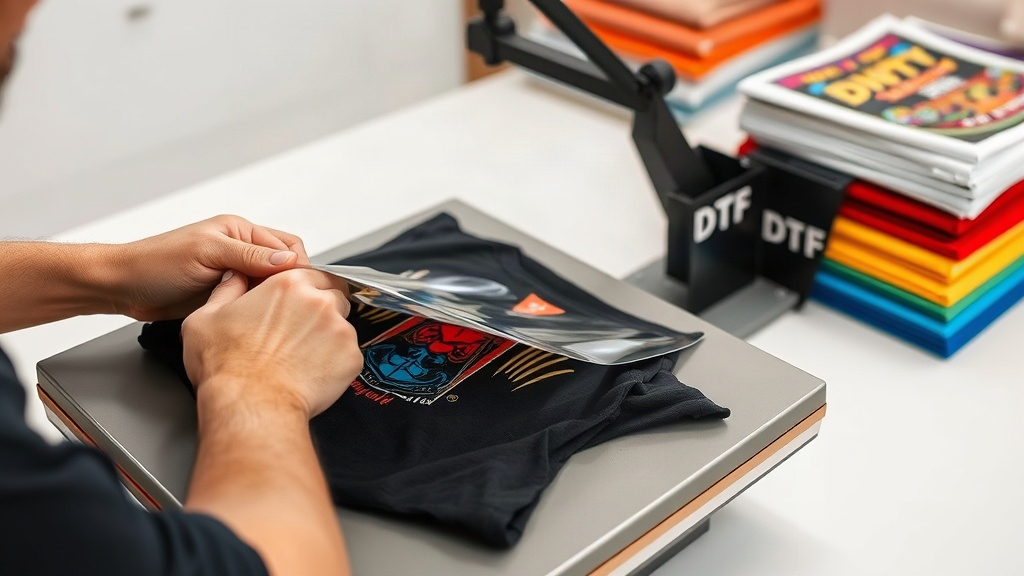
If you're exploring new ways to create custom apparel, dtf transfers are likely on your radar. This printing method has revolutionized how small businesses and hobbyists produce vibrant, durable designs on various fabrics. Unlike traditional screen printing, DTF (Direct to Film) is accessible, versatile, and yields stunning results. In this guide, we'll break down everything you need to know about dtf transfers, from the basic process to insider tips that will elevate your printing game. Whether you're a complete novice or looking to refine your technique, this comprehensive overview will set you on the path to professional-quality custom garments.
What Are DTF Transfers?
DTF transfers are a relatively new printing method where a design is printed onto a special film using a DTF printer and then transferred to fabric using heat and pressure. The process involves printing a mirror image of your design onto a PET film, dusting it with adhesive powder, curing the powder, and then heat-pressing the film onto the garment. The result is a soft, stretchable, and highly durable print that can withstand repeated washing without cracking or fading.
This technique is particularly appealing because it doesn't require pre-treating the fabric, unlike direct-to-garment (DTG) printing. You can print onto a wide range of materials, including cotton, polyester, blends, and even denim or leather. The flexibility and ease of use make dtf transfers a favorite among custom apparel creators, from hobbyists to established businesses.
How DTF Printing Works
Understanding the step-by-step process of creating dtf transfers helps you appreciate its value and troubleshoot any issues. Here's a breakdown:
- Design Creation: Your artwork is prepared using graphic design software. Ensure it's high resolution and properly sized for your transfer.
- Printing: The design is printed onto a specialized PET film using a DTF printer equipped with white and CMYK inks. The white ink layer acts as a base to make colors pop, especially on dark fabrics.
- Adhesive Application: Hot-melt adhesive powder is applied to the wet ink layer. This powder is what bonds the print to the fabric.
- Curing: The film is passed through a dryer or heat tunnel to cure the adhesive powder, fusing it to the ink.
- Transfer: The cured film is placed on the garment, and a heat press applies pressure and temperature (typically 160-170°C or 320-340°F) for about 10-15 seconds.
- Peeling: After pressing, the film is peeled away, leaving the design embedded in the fabric.
This process creates a vibrant, flexible print that feels soft to the touch. Because the adhesive is part of the transfer, you get a strong bond that lasts through many washes.
Benefits of Using DTF Transfers
Why have dtf transfers become so popular? Let's look at the key advantages:
- Versatility: DTF works on almost any fabric type, including blends and tricky materials like nylon or performance wear.
- No Pre-Treatment: Unlike DTG, you don't need to pre-treat garments, saving time and money.
- Excellent Color Output: The white ink base ensures vibrant colors on dark backgrounds, and the film preserves fine details.
- Durability: Prints are stretchable, crack-resistant, and can last for many washes when cared for properly.
- Cost-Effective: For small orders or one-off designs, DTF is more economical than screen printing, which requires expensive setup.
- Easy Registration: Since the design is printed on film, there's no need to align multiple screens for multi-colored designs.
These benefits make dtf transfers an excellent choice for startups, online sellers, and even established print shops looking to expand their offerings.
DTF vs. Other Printing Methods
To truly appreciate dtf transfers, it helps to compare them to other common methods:
DTF vs. DTG
Direct-to-garment printing (DTG) is similar in that it prints directly onto fabric, but it requires a pretreatment liquid for the ink to bond properly. DTF doesn't need this, and it allows you to print on many more fabric types. DTG is often limited to 100% cotton, while DTF can handle polyesters and blends with ease. Additionally, DTF prints tend to be more durable, especially on stretchy garments.
DTF vs. Screen Printing
Screen printing is the traditional method for large batch orders. It produces excellent results but is expensive for small quantities due to setup costs. DTF transfers are perfect for short runs because there's no screen setup; you just print your design on demand. For single custom pieces or small batches, DTF is much more practical and affordable.
DTF vs. Heat Transfer Vinyl (HTV)
HTV involves cutting out vinyl designs and pressing them onto garments. It's great for simple designs with few colors, but it's tedious for complex, multi-colored graphics. DTF transfers can reproduce intricate full-color designs with gradients and small details in a single pass, saving time and effort.
By understanding these differences, you can choose the right method for your specific needs. However, for most custom apparel projects, dtf transfers offer an unbeatable combination of quality, ease, and cost-effectiveness.
Essential Equipment and Materials
To start with dtf transfers, you'll need the right tools. While you can purchase pre-made dtf transfers from suppliers, many creators opt to produce their own. Here's what you need:
- DTF Printer: A printer specifically designed for DTF or a modified Epson printer with a DTF conversion kit. Look for features like white ink circulation to prevent clogging.
- DTF Inks: CMYK and white ink are essential. High-quality inks ensure vibrant colors and proper adhesion.
- PET Film: This is the carrier film onto which you print. Choose films with a good coating for ink absorption and release.
- Adhesive Powder: Hot-melt powder that activates under heat. Particle size matters; finer powder gives a softer hand feel.
- Heat Press: A quality heat press with precise temperature and pressure control is crucial for consistent results.
- Curing Oven or Dryer: For melting the adhesive powder before pressing. Some setups use a heat press for curing, but a dedicated dryer speeds up production.
If you're just starting, you might want to test with pre-made dtf transfers to learn the pressing process before investing in a full printing setup.
Step-by-Step Guide to Pressing DTF Transfers
Once you have your dtf transfers, whether pre-made or self-printed, pressing them correctly ensures a professional finish. Here’s a detailed guide:
- Pre-Press the Garment: Place the shirt on the heat press and press for 2-3 seconds to remove moisture and wrinkles. This also helps the transfer adhere better.
- Position the Transfer: Place the dtf transfer on the garment with the film side up and the printed side facing down. Use a heat tape or temporary adhesive spray to prevent shifting.
- Set the Heat Press: Temperature should be around 160-170°C (320-340°F) depending on the fabric. Pressure should be medium to firm, around 4-6 bar.
- Press the Transfer: Apply full pressure for 10-15 seconds. The exact time may vary based on your heat press and the transfer manufacturer's instructions.
- Peel the Film: While still hot, peel the film away. If you peel hot, you'll get a glossy finish; if you wait for it to cool, you'll get a matte finish. Choose based on your preference.
- Post-Press (Optional): Some printers recommend a second press with a silicone sheet or Teflon paper to ensure the adhesive fully cures. This can enhance durability.
- Cool and Test: Allow the garment to cool completely, then give it a gentle stretch to ensure the print doesn't crack.
Always test on a sample fabric before pressing your final product. Different fabrics may require adjustments in time and temperature.
Tips for Getting the Best Results
To achieve professional-quality dtf transfers, keep these expert tips in mind:
- Choose the Right Film: Not all PET films are the same. Select one that is compatible with your printer and ink to avoid bleeding or poor release.
- Prevent Ink Clogging: White ink settles quickly, so ensure your printer has a good circulation system. Shake ink cartridges regularly and run cleaning cycles.
- Use the Right Powder: The powder particle size affects the hand feel and adhesion. For dark garments, a thicker powder may be needed, while lighter garments can use a finer powder.
- Control the Environment: Dust and humidity can affect print quality. Keep your workspace clean and maintain proper humidity levels.
- Test Wash Cycles: Always wash test prints to check for cracking or fading. Adjust your pressing time or temperature if needed.
- Consider the Fabric: For stretchy fabrics, use a lower pressure and slightly longer pressing time to ensure the print doesn't crack when stretched.
By paying attention to these details, you'll produce dtf transfers that look great and last long.
Common Mistakes to Avoid
Even experienced printers can encounter issues. Here are common pitfalls and how to avoid them:
- Incorrect Temperature: Too low temperature leads to poor adhesion, while too high can scorch the fabric or make the film stick. Always check the manufacturer's recommendations.
- Not Pre-Pressing: Skipping this step can trap moisture, causing the transfer to wrinkle or flake off.
- Peeling Too Early: If you peel the film while it's too hot, you might pull off some ink. Wait a few seconds or let it cool, depending on the finish you want.
- Overloading the Press: Pressing too many garments at once can reduce pressure and heat distribution. Follow the press's capacity guidelines.
- Using Poor Quality Inks: Cheap inks can cause color fading or bleeding. Invest in reputable brands for consistent results.
Avoiding these mistakes will save you time and frustration.
Frequently Asked Questions
Can I use DTF transfers on any fabric?
Yes, dtf transfers work on a wide range of fabrics, including cotton, polyester, blends, and even some specialty materials like leather or denim. However, the optimal results are achieved on fabrics with a high cotton content or poly-cotton blends. For 100% polyester, you may need to adjust the pressing time and temperature to prevent melting the fabric.
How long do DTF transfers last?
With proper care, dtf transfers can last as long as the garment itself. They are highly durable and resistant to cracking, peeling, and fading. To extend the life, wash garments inside out in cold water and avoid tumble drying on high heat. This will keep your prints looking vibrant for many washes.
What is the difference between hot and cold peel DTF transfers?
The difference lies in when you peel the film after pressing. Hot peel means you peel immediately after pressing while the transfer is still hot, which gives a glossy finish. Cold peel means you let the transfer cool for a few seconds to a minute before peeling, resulting in a matte finish. The choice depends on the desired look and feel. Some transfer films are designed for specific peeling methods, so always check the instructions.
Can I use DTF transfers on dark-colored garments?
Absolutely! One of the main advantages of dtf transfers is that they print with a white ink base, which ensures colors remain vivid and opaque on dark fabrics. This makes DTF transfers an excellent choice for custom black t-shirts or other dark-colored apparel.
Do I need a special printer for DTF transfers?
Yes, you need a printer that can handle white ink and print on PET film. You can purchase a dedicated DTF printer or convert an existing inkjet printer with a DTF conversion kit. It's important to use a printer with a proper white ink circulation system to prevent clogging. If you're not ready to invest in a printer, you can buy pre-made dtf transfers from suppliers and just do the pressing.
Final Thoughts
DTF transfers have opened up a world of possibilities for custom apparel creators. Their versatility, durability, and ease of use make them a go-to choice for both beginners and professionals. Whether you're printing for fun or building a business, mastering this technique will allow you to create stunning, long-lasting prints that your customers will love. So, gather your equipment, experiment with different fabrics, and start making your mark in the world of custom printing.