
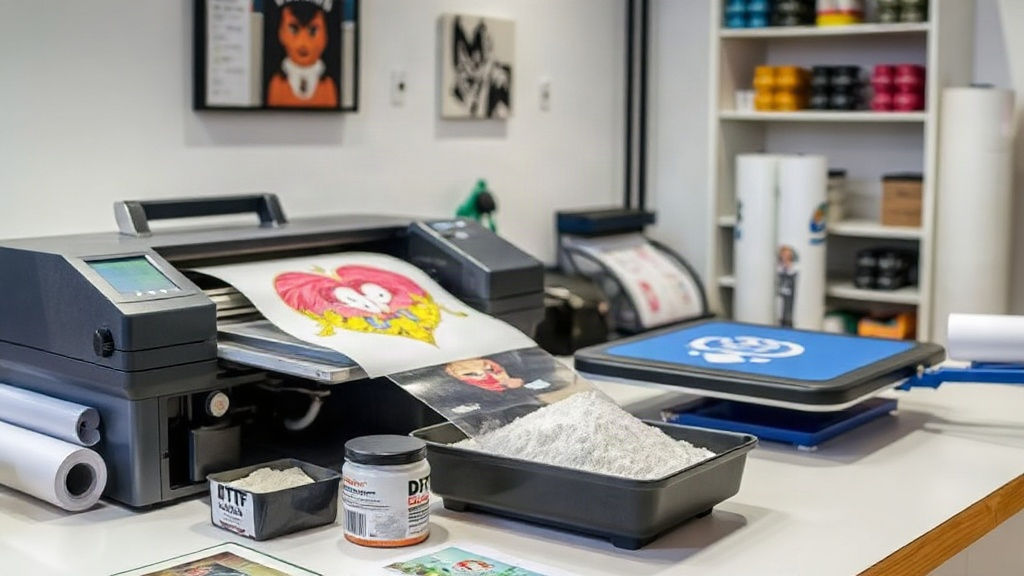
DTF printing has taken the custom apparel world by storm, and for good reason. Unlike traditional methods, this technology lets you print vibrant, detailed designs on a wide range of fabrics, from cotton tees to polyester hoodies. If you are just starting out, the learning curve might seem steep, but with the right knowledge, you can produce professional results without a massive investment. In this guide, I will walk you through everything you need to know about DTF, including the essential materials, the step-by-step process, and common pitfalls you should avoid.
When I first tried DTF, I was overwhelmed by the number of options: films, powders, inks, and printers. But after countless test prints and a fair share of mistakes, I learned what works and what does not. Let me share that experience with you so you can skip the trial and error.
What Is DTF Printing and Why It Matters
Direct to film, or DTF, is a printing method where you print your design onto a special PET film, apply adhesive powder, and then heat press it onto the fabric. The result is a soft, stretchy, and durable print that does not crack easily. This technique has become popular among small businesses and hobbyists because it offers the flexibility of digital printing with the durability of screen printing.
The biggest advantage of DTF is its versatility. You can print on cotton, polyester, blends, and even leather or nylon. There is no need for pretreatments like in direct to garment printing, and you can produce full-color images with fine details. Plus, the transfers can be stored for later use, which is perfect for on-demand orders.
Essential Equipment and Materials
Before you dive into production, you need to gather the right tools. Here is a breakdown of what you will need:
DTF Printer
While you can convert some standard inkjet printers, it is highly recommended to invest in a dedicated DTF printer. These machines have a robust ink delivery system and often include white ink circulation, which is crucial because white ink tends to settle. Look for a printer with at least four colors plus white, and ideally a built-in platen to keep the film flat. For beginners, a single-head model like the Epson XP-15000 conversion is budget-friendly, but if you plan to scale up, consider a dual-head printer like the P4 or P6 series.
DTF Films
The film is the canvas for your design. There are two types: hot peel and cold peel. Hot peel films allow you to remove the transfer immediately after pressing, while cold peel requires waiting for it to cool down. For beginners, hot peel is often easier because it speeds up the process. However, some films are more compatible with certain inks and powders, so it is wise to test a few brands. High-quality films have a coating that prevents ink bleeding and ensures sharp edges.
DTF Powder
The adhesive powder is what makes the design stick to the fabric. There are two main types: hot melt and cold melt. Hot melt powder is applied after printing and then melted in a curing oven or heat press. Cold melt powder is less common and requires a different process. Make sure to choose a powder with fine granules for better adhesion and a softer hand feel. You will also need a powder shaker or a dedicated powder machine to apply it evenly.
Inks
DTF inks are pigment-based and include white, cyan, magenta, yellow, and black. The quality of the ink affects color vibrancy and washability. Always use inks that are compatible with your printer and film. Some brands offer a pretreatment liquid that can be added to the ink to improve adhesion on certain fabrics, but this is optional.
Heat Press
A heat press is essential for both curing the powder and transferring the design. You can use a clamshell or swing-away press, but a swing-away is more versatile for thicker items. For curing the powder, a conveyor dryer is ideal because it provides consistent heat and airflow. But for beginners, a heat press with a temperature gun can work: you press the film for a few seconds to melt the powder, then press it again to transfer the design.
The Step-by-Step DTF Printing Process
Now that you have your materials, let us walk through the process from design to finished product.
Step 1: Prepare Your Design
Start by creating your artwork in a software like Adobe Photoshop or Illustrator. The design should be in high resolution, ideally 300 DPI. Remember to mirror your design horizontally because you will be printing on the back side of the film. Also, use a white layer under the design to ensure opacity on dark fabrics. Many printers have a RIP (Raster Image Processor) software that helps with color management and white underbase settings.
Step 2: Print on the Film
Load the film into your printer with the printable side facing up (the side that feels rough). Print your design, making sure the white ink is laid down first if you are using a layered approach. Most DTF printers will handle this automatically if you set the print mode correctly. Allow the ink to dry for a couple of minutes.
Step 3: Apply the Adhesive Powder
Spread the film on a flat surface and cover it with the adhesive powder. You can use a powder shaker or a specialized machine. Ensure the powder covers the entire printed area evenly. Then, shake off the excess powder. It is crucial to remove any powder from the areas without ink, as it will cause unwanted adhesion.
Step 4: Cure the Powder
Place the film in your curing oven or use your heat press to melt the powder. If using a heat press, set it to about 160°C (320°F) and press for 10 to 15 seconds with medium pressure. You will see the powder turn from granular to a smooth, glossy texture. This step is vital for the powder to bond with the ink.
Step 5: Transfer the Design
Preheat your garment for a few seconds to remove wrinkles and moisture. Then, place the film on the garment with the printed side facing down. Use a heat-resistant tape to secure it. Press at about 160°C (320°F) with firm pressure for 15 to 20 seconds. If you are using hot peel film, peel the film away immediately after pressing. For cold peel, wait until it cools down completely.
Step 6: Final Curing (Optional)
Some printers recommend a final curing step to ensure maximum durability. You can press the printed area again with a Teflon sheet for a few seconds, but this is not always necessary if your initial transfer was done correctly.
Common Mistakes and How to Avoid Them
Even with the best equipment, beginners often encounter issues. Here are some pitfalls I have faced and how you can steer clear:
- Poor powder coverage: If the powder is too thick or too thin, the transfer will fail. Use a consistent method and always shake off excess thoroughly.
- Incorrect curing temperature: If the powder does not melt completely, it will not adhere well. Check your temperature with a reliable thermometer and test on scrap fabric.
- Film curl: This happens when the film is exposed to heat or moisture. Store films in a cool, dry place and handle them by the edges.
- Ghosting or blurry prints: This often occurs when the ink is not dry before applying powder, or if the film shifts during pressing. Ensure the ink is dry and use heat-resistant tape to hold the film in place.
- Color fading after wash: This is usually due to low-quality ink or powder. Invest in reputable brands and always follow the recommended washing instructions for the garment.
Tips for Scaling Your DTF Business
Once you have mastered the basics, you might want to turn this into a profitable venture. Here are some tips to help you scale:
Invest in a Powder Shaker and Curing Oven
Manual powder application is time-consuming and inconsistent. A powder shaker and a conveyor dryer can increase your productivity and improve quality. They are worth the investment if you plan to produce more than 50 prints a day.
Offer Pre-Made Transfers
Many customers want to buy ready-to-press transfers. You can create a catalog of designs and sell them in bulk. This reduces your production time because you can print and cure the transfers in advance.
Focus on Niche Markets
Instead of competing with large print shops, specialize in a niche, such as pet apparel, workwear, or sports uniforms. This allows you to tailor your designs and marketing efforts.
Frequently Asked Questions
Can I use a regular inkjet printer for DTF?
Technically, you can convert a printer like the Epson EcoTank or XP series, but it requires a continuous ink system for white ink and often fails due to clogging. For consistent results, a dedicated DTF printer is recommended.
What is the difference between hot peel and cold peel film?
Hot peel film allows you to remove the transfer immediately after pressing, which speeds up production. Cold peel film requires you to wait until the transfer cools down, which can be more forgiving for beginners. Both produce durable prints, but hot peel is more efficient.
How do I fix DTF transfers that crack or peel?
Cracking or peeling usually indicates that the powder was not cured properly or the transfer was pressed with too low temperature or pressure. Make sure your powder is fully melted and that you use the correct pressing time. Also, avoid over-stretching the fabric after printing.
Is DTF printing suitable for dark fabrics?
Yes, DTF works exceptionally well on dark fabrics because you print a white underbase. The white ink layer provides opacity, so your colors pop. Just ensure your design has a white layer underneath.
How many washes can a DTF print withstand?
With proper application and care, a DTF print can last for 50 or more washes. To maximize durability, wash the garment inside out in cold water and avoid tumble drying.
Final Thoughts
DTF printing opens up a world of possibilities for custom apparel. With the right equipment and a bit of practice, you can produce high-quality prints that rival professional shops. Start small, test different films and powders, and keep a journal of your settings. Before you know it, you will be creating vibrant, long-lasting transfers that your customers will love. Remember, every expert was once a beginner, so do not be afraid to make mistakes and learn from them.